By Dimi Sandu, Head of Solutions Engineering (EMEA)
When purchasing a security camera, there are many factors to consider, from speeds and feeds to features and functionalities. But one thing often overlooked is the mount that best fits the environment where the camera will be placed. And although, in most cases, a mount is not required, without it you can expect a degraded viewing experience or higher maintenance costs.
Let’s delve deeper into the most common mounts, and where they best fit:
Wall-mounted L-bracket (ACC-MNT-3)
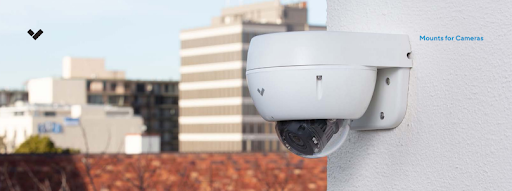
The most common deployment scenario for this mount is for outdoor cameras, pointing them downwards instead of screwing them directly onto the wall. This means less dust and rain will accumulate on the glass dome, resulting in fewer cleaning trips throughout the lifecycle of the product. Dust and dirt impact the quality of the image, especially at night, when the IR illuminators will reflect and block parts of the view.
Arm mount (ACC-MNT-2 or ACC-MNT-XLARM-1)
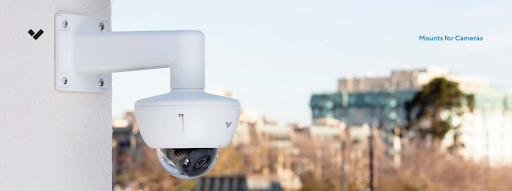
Similar to the L-bracket, this mount points the camera downward, but also pushes it further from the wall, allowing you to not only point the camera at a point of interest behind itself (e.g. a door), but also work around obstructions (such as pipes running vertically).
Note: the arm mount cannot screw directly into a Verkada camera, one needs a pendant cap in the middle, described in the next section. Use ACC-MNT-XLARM-1 with the PTZ camera, in order to support its weight.
Pendant cap mount (ACC-MNT-8 or ACC-MNT-MPEND-1)
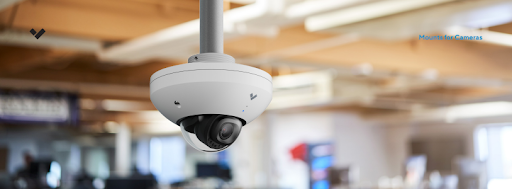
Placing a camera on a tall ceiling will impact the clarity of the recording, especially when it comes to details at a distance. In this case, lowering it using a regular pipe (with a thread size matching the mount - check the documentation for more info) will help it get closer to the subjects of interest. Just make sure not to lower it so much that objects will obstruct its sight, or where it could be hit by moving vehicles (e.g. forklifts in a warehouse).
Note: Verkada offers pendants for both regular (ACC-MNT-8) and mini domes (ACC-MNT-MPEND-1), as they differ in size.
Angle mount (ACC-MNT-7)
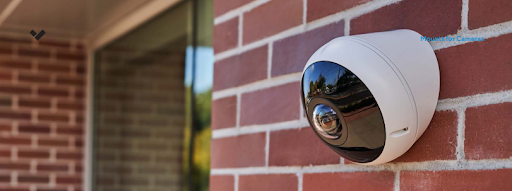
Although it could be used with domes, the angle mount is essential when deploying fisheye cameras on a wall. Without one you will be capturing the sky or a neighboring property, but not what is actually underneath the camera itself.
Note: the angle mount with wall-mounted fisheyes is one of the strongest recommendations we have today, no matter the height the device is placed.
Pole mount adapter (ACC-MNT-9)
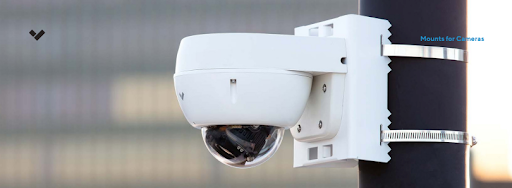
As the name suggests, you can use this mount to secure cameras on poles (dimensions vary - check the datasheet for more info). Bullet cameras will be able to be screwed in directly, while others (such as domes) require an extra mount (e.g. L-bracket, as per the picture).
Corner mount (ACC-MNT-CORNER-1 or ACC-MNT-10)
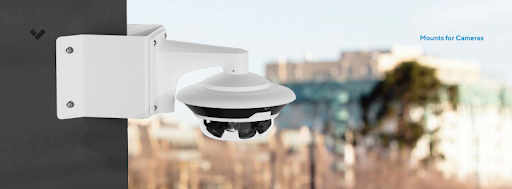
Similar to the pole mount adapter, these mounts are designed with a 90-degree angle, in order to be screwed onto two adjoining walls. From there, you can either mount the camera directly or utilize other mounts to point the camera down (essential for multisensors and the PTZ).
Note: ACC-MNT-CORNER-1 has been designed to support the weight of the PTZ camera, do not use ACC-MNT-10 in that scenario.
Square junction box (ACC-MNT-11)
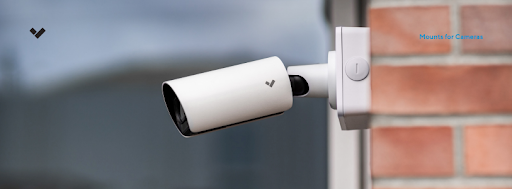
Designed specifically for our bullet series (CBx2), this junction box allows you to link the camera’s pigtail connector with your existing Ethernet cable. This comes in use when you cannot insert the connector into the wall the camera is placed on.
Note: generation 2 bullets come with a junction box adapter in the box; this mount is not required for generation 1 bullets (as the Ethernet cable is inserted directly into them).
Weather shield (ACC-CAM-SHIELD-1)
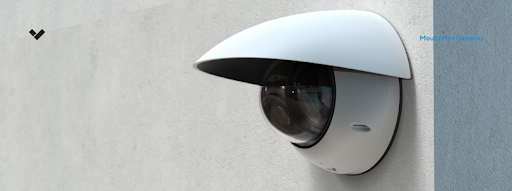
A great alternative to the L-bracket, to keep domes and fisheyes clear of water and dust accumulations.
Recess ceiling mount (ACC-MNT-REC-1)
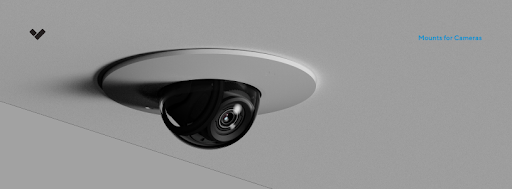
When aesthetics are important for your business, hiding the base of the dome is a common deployment strategy. This mount allows you to recess the camera into the ceiling, only exposing the glass dome to the outside.
There are many more niche use cases when it comes to mounts, but make sure you get in touch with your technical representative if you want to discuss the options and get advice. It is important to point out that many of the mounts can work together, and this compatibility is listed at the beginning of this document.
Check out our full spec guide for more information. For more videos on physical security & networking, follow Dimi on his YouTube channel: https://www.youtube.com/c/DimitrieSanduTech